
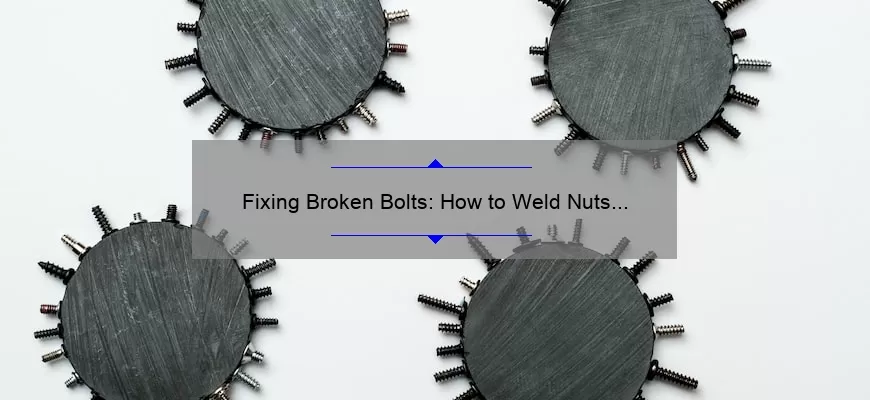
Short answer: Weld nut onto broken bolt
Welding a nut onto the end of a broken bolt can be an effective way to remove it from a threaded hole. The heat generated by welding can help loosen rust and corrosion, making removal easier. Use caution when applying heat near flammable materials or in confined spaces. Always wear proper safety gear when using welding equipment.
Step-by-step Guide on How to Weld a Nut onto a Broken Bolt
Welding is an essential skill for any handyman, mechanic or DIY enthusiast. It’s a great way to repair broken parts and components on your own, without spending any money on a professional welder. That being said, welding can be tricky and intimidating for beginners.
One common problem that many people face during their welding projects is when they break off a bolt while trying to remove it from the object with force. This situation might seem frustrating at first but don’t worry – there’s always a solution! In this blog post, we’ll go through step-by-step instructions on how to weld a nut onto a broken bolt and fix the issue like a pro.
Step 1: Gather Your Tools
Before starting your project, you need to have all necessary tools within reach. For this particular job of welding nut onto broken bolts you will need:
– A wrench
– A drill
– High-speed steel (HSS) drill bit (around the same size as your bolt)
– Welding machine/arc-welder/MIG/TIG (depending upon what suit you best)
– Set of pliers
– Safety glasses or goggles
Step 2: Prep The Broken Bolt Area
Once you have everything arranged then begin by removing debris around the area where the bolt has been broken-off using pliers or clamp-puller depending upon what suits best in that scenario . After clearing/cleaning up make sure there are no loose materials left.
Step 3: Drill Through The Broken Bolt
In order to weld new fastening material overwhere old one got sheared off; use HSS drill-bits sized approximately similar than original thread width of diameter across tip surface area which would allow screw fitting into place neatly without too much excess space once heat-applied rod placed into hole(depth-wise). Once drilled all-the-way-through its important not allow boring dustin entrance point created readymade channel now available(hold idea-less machine-blowers come into play).
Step 4: Choose The Right Nut and Align It To The Hole
After drilling the hole through bolt, it’s time to select a hexagonal nut with ample room for heat material wrapping around inner contours of top-most surface. Place the nut in alignment over tip surface area make sure no extra protruded length which may hinder welding job.
Step 5: Weld Up The Nuts Over Bolt Area
Now here comes the most important part – due attention must be given as per safety concerns like wearing gloves along with using goggles while performing task because high intensity of radiations could cause lampblinks or blindness therefore before touching metal-cased gun-select appropriate mode from list settings available including voltage=ampere-ratio set-up (use just enough amps not more than required). Now weld up section under constant pressure against welded zone equal on either side giving sufficient cooling-time after completion never too early lest residues ruin hard work done.
Step 6: Cooling Time For New Attachment Point & Clean-Up Process Begin
Once your nuts are fastened securely over such broken-off point you now need to wait forat least20-30 minutes allowing them cool down minimum till normal temperature achieved then only takeout wrench out and begin clean up process by changing out any spatters found near joint-band edges cleanup slag accumulated inside drill holes created during operation with fabricator tool removing all otherwise its very likely next-user facing difficult removal tasks at later stages beyond repair scope always make debris-free surfaces.
Congratulations! You have successfully completed step-by-step guide on how to weld a nut onto a broken bolt. With these easy-to-follow steps, you can fix this common issue easily without spending much money or expertise. If you want to learn more about welding tools, techniques or projects, check our other blogs posts we’ve shared previously here mentioning similar solutions that solve major maintenance issues faced regularly – happy reading ahead!
FAQ: Everything You Need to Know about Welding a Nut onto a Broken Bolt
Welding is a process that involves the application of heat to join two or more metal parts together. One common welding technique that is often used is welding a nut onto a broken bolt.
If you have ever faced a situation where you found yourself with a broken bolt, then you know just how frustrating and time-consuming it can be to try and remove it. The good news is that if you’re handy with tools, then there’s an easy solution – welding!
Below are some answers to commonly asked questions about welding nuts onto broken bolts:
Q: Why would I need to weld a nut onto a broken bolt?
A: You might find yourself in this situation when trying to remove or replace something like an exhaust manifold or cylinder head studs. Due to exposure to extreme temperatures and other environmental factors, bolts may rust, become corroded and break off which makes them difficult (if not impossible) to unscrew using traditional methods.
Q: What materials do I need for this task?
A: For this job, you’ll typically require MIG welder equipment along with gloves & goggles for safety purposes. Aside from these basic requirements; clean socket wrenches & wrench extensions will also come in quite handy while doing your work.
Q: Can’t I simply use heat and penetrant spray rather than Weld Nut onto Broken Bolt?
Sometimes applying heat alone has the ability of increasing oxidation on even further debris caused by excessive frictional force over years thus making removal almost impossible without breaking the bolt off completely – hence adding penetrating oil into play greatly improves lubrication quality around threads as well reducing tension required during unscrewing motion which ultimately prevents damage/most surefire way avoiding physical hassle/prime method maintenance.
However, high chances exist one may accidentally round the edges on stubborn stubs since they’re already brittle after being exposed weather conditions maybe fraying interfaces surrounding material.
Welding offers Best possible results skill-wise under circumstances demanding optimal precision whilst still taking into consideration potential wear and connection to other parts attached along way.
Q: Can I use any type of nut for this process?
A: It’s important to choose a nut that has a compatible thread with the broken bolt, or else it won’t serve its purpose adequately.
Q: How can I ensure my welded nuts stay securely in place?
A: The key is choosing high-quality materials & doing meticulous welding works preparing surfaces ensuring secure firm hold-down hence increasing your scrupulousness essential. Make certain proper equipment level tools are present since miscalculations likely cause accidental induction more problems afterwards.
In conclusion, learning how to weld a nut onto a broken bolt will undoubtedly save you time and money while saving your vehicle from unnecessary damage or possible component failure issues. By following these simple steps; one can set up an effective system safely performing job each time guaranteed success every single attempt!
Top 5 Reasons Why Welding Nut onto Broken Bolt is the Ultimate Solution
When it comes to fixing a broken bolt, the options can seem pretty limited. In fact, many people assume that once a bolt has been sheared off or stripped out, there’s nothing left to be done except for reaching for the drill and extractor set.
However, if you’re looking for an alternative solution that won’t involve drilling or any other intense methods, then welding a nut onto the broken bolt might just be what you need! Here are five reasons why welding a nut onto a broken bold is an ultimate fix:
1. Welding put less stress on the surrounding material.
Welding provides your machine with plenty of strength where it needs it most — at the joint itself — without adding undue stress to adjacent pieces as removing bolts can do. By simply affixing another piece (the nut) of sturdy metal using heat and joining techniques rather than physically altering targeted metal remains intact and unencumbered by new holes or spaces used by typical repairs.Extracting screws in difficult-to-reach machinery areas can also result in collateral damage since extracting solvent stains working parts created from exposure.
2. It saves time
Drilling and tapping through leftover fragments takes substantial energy while still not guaranteeing success. Once decided upon immediate action remedy breaks up waste hours compared to waiting for necessary materials when jumping into serious alterations destroys probability of proceeding with present plans.In situations like heavy equipment too big to disassemble this method avoids dismantling altogether; perfect when minimizing labor is essential.
3. It is cost-effective
Investment into work-ready hardware isn’t cheap neither is outsourcing maintenance jobs.So save money buy purchasing inexpensive nuts over pricey replacements valuable option in times of operational tightness.Worse part about expensive replacement means delays till arrival which every moment spent on rendesvous down machines negates profit accumulation further pushing toward failure threshold.Table saws ,front-load washers,diesel engines all fall under reuse solar plexus; thankfully welding can adapt to swift service amidst performance demands.
4. Welding is less likely to cause damage
When removing a broken bolt or repairing it via saws, many times the operation results in additional damage. The latter can be avoided by making use of heat for repair and joining pieces through welding that will leave the particular machinery structure untouched.Machinery concerns are not limited to those involving only things made from metal — wooden fixtures may also suffer when excessive force is applied.Leather goods? Forget about it!
5. It creates a strong and reliable joint.
Last but not least, welding provides your machine with plenty of strength where it needs it most — at the joint itself — without adding undue stress to adjacent pieces as drilling does.Bolt won’t budge once nut has been welded onto her.Alternatives include surrounding screw threads with glue before forcing nut over held down area.Welding under high temperatures preserves bond allowing screws longer lifespan compared to liquid infusions.
To sum up, if you’re looking for an efficient, cost-effective fix that doesn’t come with any unwanted side effects then nothing compares to welding nuts onto bolts.Too bad we cannot say same about using brass knuckles!
Tools & Safety Measures Required for Welding Nut onto Broken Bolt
Welding nuts onto broken bolts is a common technique used to extract stubborn bolts. This method involves welding a nut onto the bolt stub and then using a wrench to turn the bolt out of its threaded hole.
However, before starting this process, it’s essential to have the right tools and safety measures in place. Let’s dive into these requirements below:
1) Welder: The first and foremost requirement for welding nuts onto broken bolts is a welder. You can use either MIG (Metal Inert Gas) or TIG (Tungsten Inert Gas) welders depending on your preference.
2) Welding consumables: After selecting the type of welder you want to use, it’s time to decide on what welding consumables are needed; steel filler wire, argon gas coverage and chemical solvent should all be at hand before beginning any kind of metal work.
3) Safety gear: Welding involves extreme heat that emits UV rays which are harmful when exposed directly without protection. So make sure you have proper protective equipment such as leather gloves, helmet with auto-darkening visor or goggles coated with anti-glare material etc. These gears cushion against debris that may come off during grinding particular metals like iron/.
4) Abrasives & grinders: Next comes abrasive materials such as grinder discs or flap wheels necessary for getting rid rust from components thus allowing them connect together more effectively
5) Clamps & vice grip: helps stabilize components whithin proximity
6) Preparing The Workspace: Keep your workspace well-lit and clear away anything flammable around..
Welding nuts onto damaged bolts must not be taken lightly because many risks arise if sufficient insufficient care isn’t given.. If followed closely though those were some tips to help keep secured while attaching parts back together after they’ve been separated due accidents or being worn down over time./
Common Mistakes to Avoid While Welding a Nut onto a Broken Bold
Welding a nut onto a broken bolt may seem like an easy and straightforward task, but it can quickly turn into a nightmare if you don’t know what you’re doing. While the process itself is relatively simple, there are several common mistakes that many novice welders make when attempting to fix this problem.
If you’re looking to avoid making these costly errors, keep reading for our step-by-step guide on how to properly weld a nut onto a broken bolt without any hitches.
Mistake #1: Not Cleaning the Area
Perhaps one of the simplest yet most critical steps in welding is ensuring that your work area is clean and free of debris. Failure to do so could result in poor adhesion or even cause dangerous sparks while welding.
Before starting your project, ensure that the surface surrounding the affected area (the broken bolt) is carefully cleaned off with a wire brush or any appropriate cleaning tool available; use chemicals like acetone if needed. Make sure there’s no rust or grease around as they would affect chemical reactions between metallic components during heat transfers and their cohesions later on after cooling down. Remember also not touch surfaces near where others have welded before
Mistake #2: Ignoring Safety Precautions
Welding requires safety measures, despite being an important fabrication skill that takes years of practice to master – Personal Protective Equipment are key to having safety from potential hazards, often associated with working under glare or UV light produced by arc-welding tools employed.
Make sure always wear protective gloves made from leather material resistant against flammable substances; lace-up boots cover ankles standing up firmly ; helm facial mask must certified according regulations guidelines – this include filters rated appropriately depending intensity of ultraviolet radiation levels; apron clothing specifically designed purpose suits well!
Additionally employ ear plugs at loud welding zones
Mistake #3: Overheating the Bolt/Nut Combination
It’s essential never underestimate heat transmitted during welding processes – it tends to exceed ordinary temperatures needed for bonding together metallic component parts! When overheated, your nut and bolt combination may become brittle which could impact their overall quality.
One way to ensure the combination isn’t overheated is by using a heat-resistant material that can withstand high pressure while in contact with molten metal-For instance you can use wet towels
We also recommend taking short intermittent breaks allowing enough time cool down of material components.
Mistake #4: Not Using Proper Welding Equipment
Believe it or not, more often than not we’ve seen many novice welders attempt to handle welding projects without adequate electrofusion tools at their disposal. For instance MIG or TIG machinery is useful when performing this particularly complex task.
Using substandard equipment predispose you far too early likelihood failure utterly undoing all the hard-work invested into fixing broken bolt –before starting electrical apparatus purchase check device’s power rating compatibility towards job severity expected from installation .
Mistake #5: Incorrectly Aligning Bolt and Nut
Perhaps one most common yet avoidable mishaps beginners make ordinarily involves improperly aligning combiner thread combinations altogether- Meaning bringing back-together an irregular pair that would likely cause problems involving internal tension!
When repairing threads issues be sure as evenly aligned mechanically possible otherwise finished product although aesthetically perfect may render unusable despite other proactive measure taken prior install completion effort required turned futile remember sometimes these little details go long way!
How Long does Welded Nut Last and When Should It Be Replaced?
A welded nut is a small but important component used in many manufacturing processes that involves metalworking. It may seem insignificant, but this little piece plays an essential role in keeping things steady, secure, and operational.
Welded nuts are usually manufactured from stainless steel or hardened carbon steel alloys to withstand harsh conditions and stress factors when fastened with bolts or screws. The welding process creates a strong bond between the nut and its mating surface by melting both materials together, making it much stronger than riveting or mechanical attachment methods.
But like all things created by man, nothing lasts forever. And even though welded nuts boast durability and strength as their main features, they are not completely invincible against environmental factors such as exposure to moisture or chemicals that can weaken them over time.
So how long does a typical welded nut last? Well, the lifespan of these tiny components depends on various factors such as load capacity requirements, usage frequency, the environment which they operate under (e.g., dry vs. wet), temperature variation (high-temperature environments), corrosion resistance properties of alloy types being used inside them etc.
Generally speaking, a properly designed welded nut should last indefinitely if it has been installed correctly according to industry standards and maintained regularly. However there are certain telltale signs your welded loosening/stripping:
• Loose threads
• Stripped edges
• Deteriorated coating
• Cracked welds
These signs signify that either too much torque was applied during installation or it has reached beyond its service life
If you notice any of these red flags while inspecting a bolt-on assembly containing welded nuts – then immediate replacement needs must be done!
Furthermore from maintenance points weldenut need special care:
* Regular inspections
* Removal & re-installation after prolonged use
* Lubrication/surface treatment for added protection
In conclusion Ongoing preventative maintenance procedures must be taken place based on cycle timer for proper wear tolerances – this will not only safeguard welded nuts but also ensure optimal performance and prevent breakdowns in operating systems.
Table with useful data:
| Material | Welding Method | Welding Materials | Preparation | Strength of Bond |
|---|---|---|---|---|
| Steel | Gas Metal Arc Welding (GMAW) | Wire electrode, shielding gas, power source | Grind the broken bolt flush to the surface, clean with acetone or alcohol | Strong bond, able to withstand high loads |
| Aluminum | Tungsten Inert Gas (TIG) Welding | Tungsten electrode, filler metal, shielding gas, power source | Grind the broken bolt flush to the surface, clean with acetone or alcohol | Strong bond but requires skilled welding techniques |
| Stainless Steel | Gas Tungsten Arc Welding (GTAW) | Tungsten electrode, filler metal, shielding gas, power source | Grind the broken bolt flush to the surface, clean with acetone or alcohol | Strong bond, resistant to corrosion but requires skilled welding techniques |
Information from an expert
As an expert in welding, I can say that if you need to fix a broken bolt with a weld nut, it’s important to clean the surfaces thoroughly beforehand. Use a wire brush or sandpaper to remove any rust or debris, and use acetone or alcohol to wipe down the area. Make sure your welder is set for the appropriate thickness of metal, and be careful not to overheat the bolt as this can weaken its strength. With proper technique, welded nuts can provide a strong and durable solution for repairing broken bolts.
Historical fact:
During World War II, welders were often tasked with repairing broken bolts on military equipment by welding a nut onto the remaining protruding bolt and then using a wrench to remove the old bolt. This technique saved time and resources during wartime repairs.


![Unlocking the Mystery of Black Gorilla Lug Nuts: A Story of Strength and Style [5 Essential Tips for Choosing the Best Lug Nuts]](https://baru-nuts.com/wp-content/uploads/2023/04/21-335x220.jpg)
![Rev Up Your Ride: The Ultimate Guide to Black Chrome Lug Nuts [Solve Your Wheel Woes with Expert Tips and Stats]](https://baru-nuts.com/wp-content/uploads/2023/04/22-335x220.webp)
![Binky Goes Nuts: A Tale of a Mischievous Pet and How to Keep Them Calm [Expert Tips and Stats]](https://baru-nuts.com/wp-content/uploads/2023/04/23-335x220.jpg)


