Introduction to Nut Sack Photography – An Overview of {{blogTopic}}
Nut Sack Photography is an emerging trend in photography that has started to gain popularity among creative individuals. It involves capturing beautiful and artistic shots of a person’s nutsack. While this may sound like an unusual concept, it can actually provide unique and interesting opportunities for photographers to explore different angles, lighting conditions, and composition techniques. The goal of this type of photography is to create a visually stimulating image that conveys whatever the photographer wants it to communicate.
While traditional portrait photography typically requires a rather serious attitude from photographers and subjects alike, Nut Sack Photography allows its participants room to be more playful and lighthearted. A well-crafted nut sack photo can be incredibly eye-catching without taking itself too seriously – as evidenced by the vast array of images available online today. From simple nutsack silhouettes to outrageous poses featuring props such as ripe fruits or uplifting snacks (and sometimes even furry friends), there are many creative angles that one could choose to go with when shooting their own photos.
Nut Sack Photography also provides excellent practice for budding photographers wanting to hone their skills at working with the natural elements around them. Finding just the right angle, making sure your subject is aware of how his/her testicles should appear in certain frames, utilizing shadows or selecting backgrounds that bring balance are all great ways in which inexperienced shooters will be able to expand their skill set upon mastery of the baseline tasks needed for this type of photography.
Besides being great practice for developing your skillset further, Nut Sack Photography also encourages photographers who feel constricted by tighter regulations dictated by clients (corporate or otherwise) on what kind of shots they need to produce – allowing them some leeway into experimenting within a lower-pressure medium with greater potential for creativity rewarded through attention gained from potential employers or peers via social media sites such as Instagram or Twitter. Additionally, many models also enjoy being involved in this type of work as it affords novelty compared to traditional modeling portfolios –not least when each session culminates into something truly memorable!
Finally – though technically not crucial – shooting outdoors would give potential customers who require outdoor representation plenty additional options wherein they will more than likely find Nut Sack Photography fruitful… All in all Nut Sack Photography offers an untapped market where imagination reigns supreme!
Equipment Needed for Capturing Perfect Nut Sacks Photos
If you’re looking to capture perfect nut sack photos, it’s important to have the right tools in order to get stunning, detailed images. You won’t need a whole lot of equipment like expensive DSLRs and fancy lenses – an entry-level camera can do the job. Here are six pieces of equipment essential for capturing perfect nut sack photos:
1. A Camera: Depending on your preference and budget, you can pick up anything from an entry-level point and shoot digital camera all the way to a professional DSLR. Whatever kind of camera you use, it should be capable of at least 8 megapixels so that you can print them out large scale if necessary.
2. A Lens: This depends heavily on your camera type; most consumer cameras have built-in lenses but DSLRs require interchangeable lenses depending on what type of shot you’re trying to capture. Canons tend to favor wider angle lenses while Nikons generally prefer longer focal lengths as they are usually used for more telephoto applications such as sports or bird watching.
3. Lighting: Proper lighting is key when taking pictures since it will determine whether or not your subject looks its best in the final photo. If you don’t have access to studio lights, natural light is great for getting started because it is free and very easy to manipulate with reflectors or other materials that help alter its color temperature and intensity, giving depth and contrast to your image without overexposing or blowing out highlights or shadows in post production work later down the line.
4. Tripod: Even if your shots look pretty steady hand-held, using a tripod increases stability which helps take sharper photos with less blurriness; plus they come in handy when shooting long exposures where it is absolutely necessary that there is no motion whatsoever (such as lightning photography).
5. Backdrop Stand/Reflector: You want some sort of background associated with each picture so buyers know what kind of setting their product in as well as how reflective or non-reflective surfaces will interact with light sources around them -so having a nice backdrop stand setup comes in quite handy here! Additionally, having something like a gold/silver reflector goes great for filling any shadowed areas that would otherwise leave detail unseen by the lens’s perspective due to any curves present throughout each nut sack photograph itself (which certainly aren’t few).
6. Post Processing Software: When all photos have been taken and your nuts look good enough already, post processing software becomes invaluable for enhancing minute details only visible within certain photographs via cropping, sharpening/blurring effects needed after being printed out shortly before sending them off could easily be managed nowadays through programs such as GIMP 2 or Adobe Lightroom while still allowing certain quality properties intact even after heavy manipulation has occurred between both programs when compared together respectively!
How to Take Pictures of Nut Sacks Step by Step
Taking pictures of nut sacks is a tricky prospect since the area is sometimes a difficult place to access and generally small. But if it’s something you want to do, here are some steps you can follow for best results:
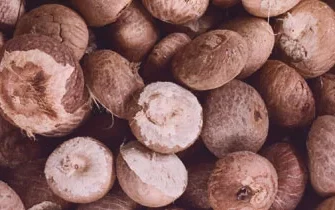
1. Choose your nuts. Like any other kind of photography, choosing high-quality materials is important for successful nut sack photos. Look for well-rounded specimens in uniform sizes and colors, ensuring they will be visually appealing when photographed. Make sure there are no blemishes that might interfere with the overall effect of the photograph.
2. Set up your equipment. The size and shape of a nut sack makes it difficult to get the right angles and lighting conditions, so set up your camera in a way that will give you the best view while still allowing room for easy manipulation. If possible, use diffused natural light instead of flash as this will result in more pleasing images overall with greater tonal ranges and detail levels. Investing in good quality lamps or studio soft boxes can also make a big difference to your shots.
3. Get creative! This is where the real fun begins; experiment with different ways to photograph these oddly shaped subjects without losing focus on their unique characteristics — or risk having an unfocused mess! Set up interesting backdrops or props (like pine cones) that act as frames around each individual nut sack or try adding texture through colored backgrounds and surfaces like fabric swatches or cardboard pieces sprayed with glitter paint! You could even create mini scenes by setting up several nut sacks inside tiny dollhouses or winter wonderlands! Be sure to keep shooting until you find something that puts a smile on your face — it’s likely someone else will enjoy it too!
4. Edit & post-process carefully – It won’t take long before you start getting excited about how great your pictures look—and that’s where careful editing comes into play!. Play around with color correction techniques, focusing corrections etc., ensuring nothing distracts from the beauty of these odd shaped creatures when showing off your work online.. When things seem just right it’s time to post them along with relevant tags so people can easily find them across various sites and social networks! Remember — once posted, don’t forget to respond promptly to feedback—as this helps build relationships within communities interested in inspired nut Sack photography topics – let them know what works best for you & share your process tips among others usually looking out for such gems online!.
FAQs About Taking Pictures of Nut Sacks
Q: What kind of camera do I need in order to take pictures of nut sacks?
A: The ideal camera for taking photos of nut sacks is one that allows you to adjust the shutter speed, ISO, and white balance manually. This will allow you to ensure that lighting and other conditions are optimal for taking the perfect shot. Additionally, if you plan on close-up shots or want to capture detail better, then a higher megapixel count will be beneficial. You could even consider using a macro lens if you’re wanting some serious detail in your photos such as scratches and hairs on the sack itself!
Q: What angle should I take my photo from?
A: When it comes to photography, angles can make or break a good picture. In general, when taking pictures of nut sacks you will want the subject (or in this case, the sack) to be slightly above eye-level. This way the light can evenly hit all angles and give them an even more three dimensional look which looks visually appealing. If possible slightly underexposing the photo by about 1/3 of a stop should add some extra contrast which can further enhance imagery.
Q: Do I need any additional equipment when shooting nut sacks?
A: You definitely could get away with only having your camera but there may be times where additional equipment may come in handy. A tripod or something similar like an octo-pod would help keep your camera still when shooting longer exposures or even time lapses if you choose too! Having some flash gels also won’t hurt so then you match your ambient lighting better with whatever colors your scene may have! Lastly, depending on lighting situations it may help to have reflectors for bouncing extra light onto subjects – though this really depends on location and situation so use judgement here!
Top 5 Facts About Nut Sack Photography
1. Nut sack photography first began as a type of artistic photography in the late 1900s. It was originally used by photographers to highlight a person’s physical features that weren’t normally visible. The popularity of nut sack photos quickly grew and soon they became an important part of body art, making them more than just an additional feature to showcase.
2. Various types of nut sack shots have been seen in fine art galleries, fashion magazines, and even advertisements over time. This is because capturing these unique images can bring out raw emotion, illustrate strength and vulnerability, or convey messages about different cultural attitudes towards nudity and body types.
3. Some believe that nut sack photography is the final frontier for body acceptance – showcasing parts of the body that normally get left out from traditional art because they are too ‘taboo’ or ‘crude’ for conventional media outlets to consider featuring.
4. To capture the perfect shot there is a lot more involved than simply pointing and shooting your camera at your subject’s package area – things like setting up props or a backdrop are essential to producing well-rounded images with full impact which takes some practicing skill to perfect!
5 .Nut sack photography has also become somewhat of an online sensation in recent years with plenty of websites encouraging people to post pictures alongside stories about how their experience has positively impacted them physically or mentally – proving how powerful this form of expression can be!
Conclusions and Final Tips for Photographing Nut Sacks
1. With the right tools, angles, and light, capturing a shot of a nut sack can be surprisingly simple and rewarding. To ensure that you get the most out of your photographs, it’s important to keep a few key tips in mind:
a. Invest in quality equipment – Whether you’re just starting out or consider yourself an experienced photographer, investing in top-of-the-line equipment is essential for taking detailed shots of nut sacks. Make sure you have a great camera body with excellent low light capabilities as well as a macro lens that can zoom into extreme detail on even the smallest subjects. Also invest in various kinds of studio lighting to adjust and experiment with the best possible shots.
b. Get creative with your angles – Moving around your subject can achieve very different results when photographing nut sacks. Try shifting your angle up or down 10 degrees at a time to find the most flattering perspective for your shots. Taking normal photos from too close may cause distortion so try instead competing higher where possible but also remember to take more extreme wide angle shots as these will give that unique wow factor!
c. Utilize natural light – Natural lighting can be an extremely powerful tool when taking pictures of items like nutsacks so plan accordingly by scouting for locations outdoors or near windows during different parts of day to capture those unforgettable moments. Being mindful about changing seasons, temperatures, and positions can make all difference in achieving unique shadows and hues so don’t forget to capitalize on those chances to create something truly special!
d. Have patience – As with any task requiring precision and attention detail, patience is essential technique when perfecting such photos as shooting nut sacks don’t come without challenges due their delicate nature combined with lack access needed areas adding difficulty customer requirements – but expect thrilling rewards when mission complete!
e. Educate yourself – Learning basics photography through videos articles help beginners become familiar types general set ups utilize while exploring depths creativity more professionally curious photographers deeply invested their craft recoup benefits aforementioned tips studies subject matter feature desired image stunning finished product!
![Unlocking the Mystery of Black Gorilla Lug Nuts: A Story of Strength and Style [5 Essential Tips for Choosing the Best Lug Nuts]](https://baru-nuts.com/wp-content/uploads/2023/04/21-335x220.jpg)
![Rev Up Your Ride: The Ultimate Guide to Black Chrome Lug Nuts [Solve Your Wheel Woes with Expert Tips and Stats]](https://baru-nuts.com/wp-content/uploads/2023/04/22-335x220.webp)
![Binky Goes Nuts: A Tale of a Mischievous Pet and How to Keep Them Calm [Expert Tips and Stats]](https://baru-nuts.com/wp-content/uploads/2023/04/23-335x220.jpg)